Send Workspace
Description
You may send all or parts of a workspace using email.
To send a workspace:
On the Desktop Control Panel, select Tools > Send Workspace... .
Optionally, check Compact Workspace before zipping? to potentially reduce its size.
Optionally, check Include absolute path names in zip file? if you want the recipient to be able to replicate your directory structure.
Optionally, check Include Web Project files.
Optionally, to make the list easier to read:
1. Click Sort by Extension to group like files together.
2. Click Sort by Name to alphabetize the list.
3. Click Sort by Natural to sort the list by creation date.
Optionally, check Hide support files? to show only workspace, table, and set files.
Place checkmarks to the left of the files that you wish to send in the Files to Zip list.
1. Optionally, click Mark All to place checkmarks next to all files.
2. Optionally, click Unmark All to remove checkmarks from all files.
3. Optionally, click Mark Files... to display the Mark Files dialog box.
4. Click OK to place checkmarks to the left of all files.
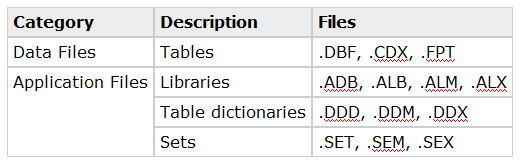
5. Click Data Files Only and OK to place checkmarks to the left of data files only.
6. Click Application Files Only and OK to place checkmarks to the left of application files only.
7. Optionally, click Unmark Files... to display the Un-mark Files dialog box.
8. Click OK to remove checkmarks from the left of all files.
9. Click Data Files Only and OK to remove checkmarks from the left of data files only.
10. Click Application Files Only and OK to remove checkmarks from the left of application files only.
Optionally, click Options to display the Send Options dialog box.
1. Select your email client by clicking either Default email client or Alpha Anywhere email client.
2. Clear Remember this selection if it is a temporary selection.
3. Click OK to continue.
Optionally, click Save Settings to display the Save Send Workspace Settings dialog box.
1. Optionally, enter a Name for the configuration and click OK to save it.
2. Optionally, select a previously saved configuration in the Choices list and click Delete to remove it.
3. Optionally, select a previously saved configuration in the Choices list, click Rename, enter a new name, and click OK.
4. Optionally, select a previously saved configuration in the Choices list, click Copy To, select another workspace (.ALB file), and click OK.
Optionally, click Load Settings to display the Load Send Workspace Settings dialog box.
Select a previously saved configuration in the Choices list and click OK to load it.
Click Send Files to display your email application.
Limitations
Desktop applications only. Not available in Community Edition.
See Also